
5. Specialities #
5.1 Indexing #
An index maps terms to the pages where they are discussed. It is different from a table of contents, which follows headings.
Load makeidx and enable indexing in the preamble. Add index entries beside the relevant words, then print the index:
\documentclass{article}
\usepackage{makeidx}
\makeindex

\begin{document}
A matrix\index{matrix} contains rows and columns.
A diagonal matrix\index{matrix!diagonal} has a special structure.

\clearpage
\printindex
\end{document}
The \index command does not print the term in the body. It records the current page in an .idx file. For a local build:
xelatex main.tex
makeindex main
xelatex main.tex
MakeIndex sorts entries and creates main.ind, which \printindex reads.
| Index entry | Meaning |
|---|---|
\index{matrix} |
A main entry. |
\index{matrix!diagonal} |
A subentry under “matrix”. |
\index{alpha@\(\alpha\)} |
Sort by “alpha”, print the mathematical symbol. |
\index{matrix|textbf} |
Print the page number in bold. |
\index{matrices|see{matrix}} |
A “see” cross-reference. |
\index{matrix|(} … \index{matrix|)} |
Start and finish a page range. |
Place \index immediately next to the text so it does not leave an extra visible space before punctuation. For non-ASCII terms, provide a suitable sorting key or use a processor designed for the document’s language. The showidx package can display entries in the margin while proofreading; remove it for the final output.
5.2 Installing Extra Packages #
Many packages are included in a TeX distribution. Check whether the package is already available before installing a separate copy. Its documentation can be opened with:
texdoc geometry
For a local installation, prefer the distribution’s package manager and read the package’s installation instructions. In an online project, a small custom .sty file can often be uploaded alongside the main file, but a package with external programs, fonts, or additional dependencies may need more support.
Traditional documented-source packages use these file types:
| File | Role |
|---|---|
.dtx |
Documented package source. |
.ins |
Instructions for extracting runtime files. |
.sty |
The package file loaded by \usepackage. |
A package’s instructions may ask you to run LaTeX on its .ins file, place the resulting files in a local TeX tree, refresh the filename database, and compile the .dtx documentation. These steps are package-specific. Avoid manually replacing files in a distribution-managed tree.
5.3 LaTeX and PDF #
Hypertext links #
Load hyperref near the end of the preamble, unless another package’s documentation specifies a different order:
\usepackage[hidelinks]{hyperref}
Existing contents entries, citations, and cross-references become clickable. hidelinks removes visible link borders and colours while keeping the links active.
To use coloured links instead:
\usepackage{xcolor}
\usepackage{hyperref}
\hypersetup{
  colorlinks=true,
  linkcolor=blue,
  citecolor=teal,
  urlcolor=blue
}
Choose one setup; do not load hyperref twice.
\section{Method}\label{sec:method}

Visit \url{https://www.ctan.org/}.
Find packages on \href{https://www.ctan.org/}{CTAN}.
Read the \hyperref[sec:method]{method section}.
See \autoref{sec:method} on \autopageref{sec:method}.
\autoref adds the element type, such as “section”. If constructing a custom link containing a number, use \ref* to avoid a nested link:
\hyperref[sec:method]{Section~\ref*{sec:method}}
A printed document cannot follow hidden link targets. Show URLs when readers need to use them from paper.
Document metadata #
Metadata is separate from the visible title page:
\hypersetup{
  pdftitle={A Reproducible Experiment},
  pdfauthor={Alex Writer},
  pdfsubject={Experimental methods},
  pdfkeywords={experiment, reproducibility, LaTeX},
  bookmarksopen=true
}
PDF viewers may use this information in their title bar, properties panel, or search interface. It does not replace \title and \maketitle.
Problems with the outline #
Bookmarks are text strings, so commands and mathematics in a heading may not translate directly. Supply a plain-text alternative:
\section{\texorpdfstring{\(E=mc^2\)}{E = mc2}}
The first argument is typeset in the document, and the second is used in the bookmark. For recurring custom commands, \pdfstringdefDisableCommands can define replacements used only while creating PDF strings.
Inspect both the visible heading and the bookmarks; a successfully compiled PDF can still have incomplete outline text.
5.4 Creating Presentations #
Basic usage #
The beamer document class creates PDF presentations. A frame is a logical slide; overlays can turn one frame into several PDF pages.
\documentclass[aspectratio=169]{beamer}
\usetheme{Madrid}
\setbeamertemplate{navigation symbols}{}

\title{A Small Experiment}
\author{Alex Writer}
\date{}

\begin{document}
\begin{frame}
  \titlepage
\end{frame}

\section{Method}
\begin{frame}{The Main Idea}
  \begin{itemize}
    \item Start with a clear question.
    \item Measure the result.
    \item Report what changed.
  \end{itemize}
  \begin{block}{Key result}
    Structure makes the argument easier to follow.
  \end{block}
\end{frame}
\end{document}
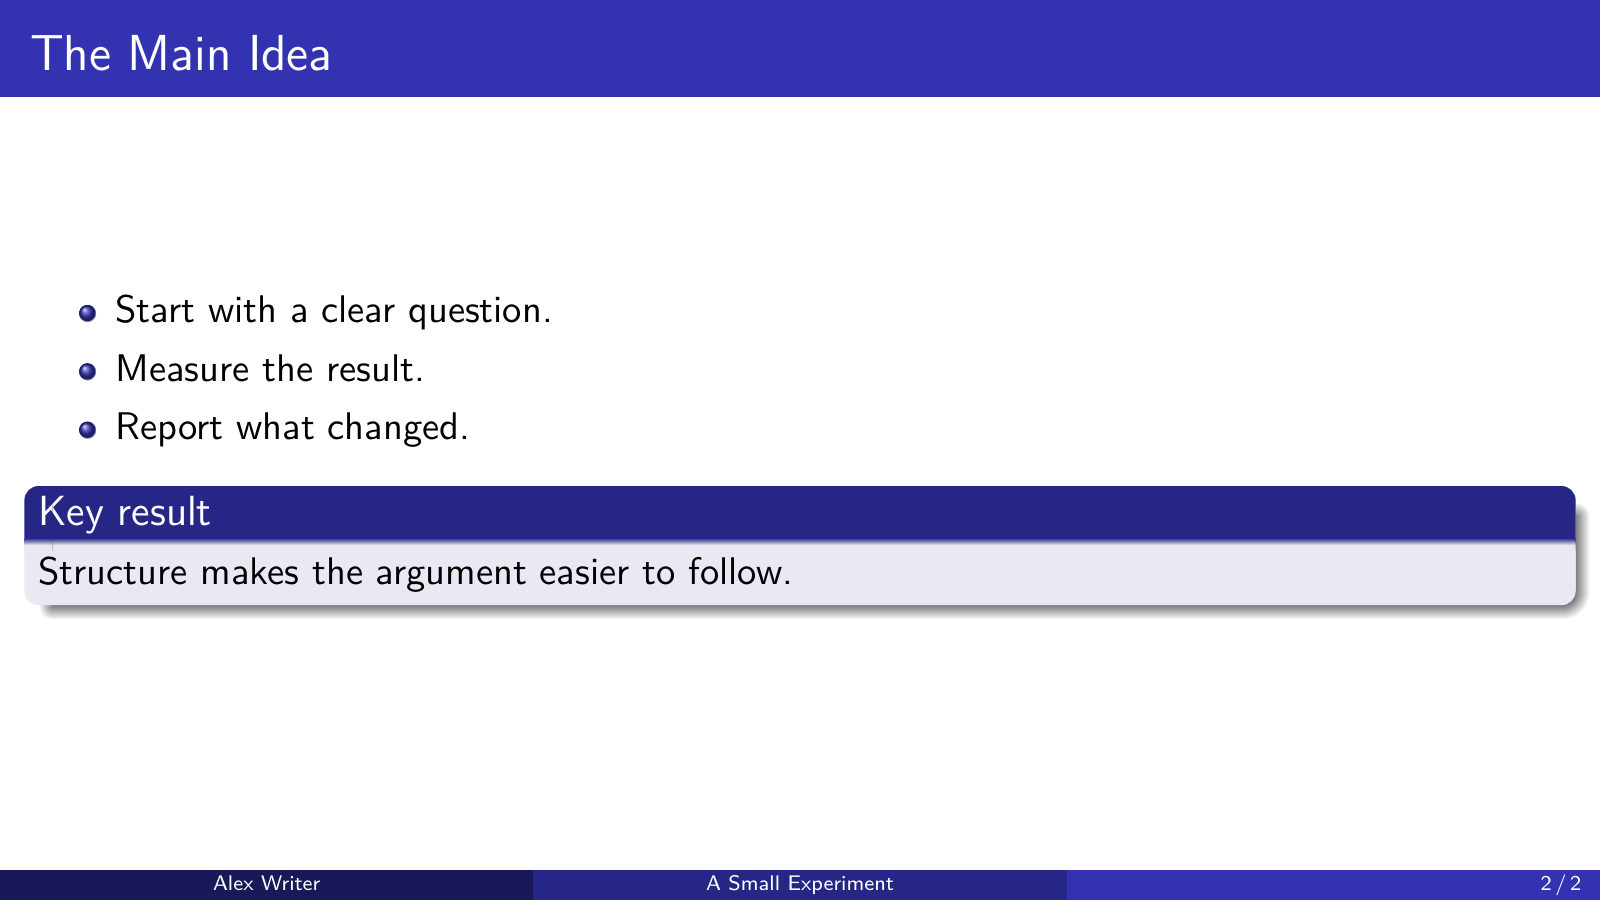
Use \alert{important} for emphasis and block, exampleblock, or alertblock for grouped material. Section commands organise navigation and contents; they do not automatically create ordinary article-style headings within frames.
A frame containing verbatim material or code listings needs [fragile]:
\begin{frame}[fragile]{A Command}
\begin{verbatim}
xelatex main.tex
\end{verbatim}
\end{frame}
Keep the ending \end{frame} on its own line.
Overlays #
\pause reveals the rest of a frame on the next overlay. Explicit overlay specifications give more control:
\begin{frame}{Three Steps}
  \begin{itemize}
    \item<1-> Prepare.
    \item<2-> Measure.
    \item<3-> Compare.
  \end{itemize}
\end{frame}
<2> means only the second overlay; <2-> means the second and later overlays; <1,3> means the first and third.
\uncover<2->{text} preserves space when the text is hidden. \only<2>{text} removes it entirely on other overlays, which can shift the layout. Use overlays to control attention, not to fragment every sentence.
Customisation #
\usetheme chooses an overall theme. \usecolortheme, \usefonttheme, \useinnertheme, and \useoutertheme control parts of it. Short optional titles and author names can keep navigation elements compact.
Use columns with column environments for side-by-side content. Allow space between columns and check that equations and figures remain readable at presentation size.
Handouts #
Change the class line to:
\documentclass[handout,aspectratio=169]{beamer}
Handout mode normally combines overlays into a single view of each frame. Check any \only alternatives: content intended for different overlays may collide when combined. Mode-specific specifications such as <beamer:2-|handout:1> let you decide what belongs in each version.
For a paper-like version, use article with beamerarticle. That changes the layout more substantially than handout mode and may need additional explanatory text.